Happenings October 2026

October 2026
Fall is Garlic Season: Plant Now for a Delicious Summer Harvest
From Paula Ream, Master Gardener, Penn State Extension
Fall is the best time to plant garlic—a good three weeks prior to the ground freezing (mid- to late-October), so the roots have a chance to develop, but not poke through the surface before winter. As a raised bed gardener, I reserve a new spot every fall after removing all the summer garden debris and amending my soil with compost for the winter. Garlic is a species in the onion genus– Allium—and is closely related to onions, shallots, leeks, and chives. These plants require at least two years, if not more, between successive plantings to allow the soil to recover. Garlic plants are usually hardy and not affected by many pests or diseases. They do require full sun and loamy soil.
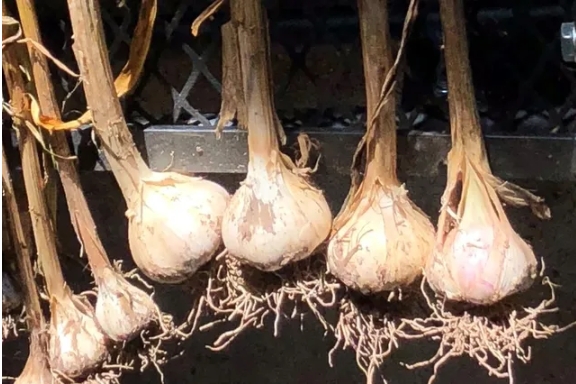
Select cloves for planting based on your preference for flavor and use. Cloves purchased from grocery stores are not a good choice. They may be varieties unsuitable for your area, and most are treated to make their shelf life longer, making them harder to grow. Find a reputable dealer and choose only clean, sound cloves. Local farmers who grow garlic are an excellent source of seed. You will need to break your bulbs down, but no more than a day before planting, so that the root nodules do not dry out and are able to set roots quickly. Sort the cloves and reserve the largest for planting; smaller cloves can be used in recipes. Larger cloves will yield larger bulbs at harvest time.
With your soil amended, plant your cloves, root side down and upright. You can plant a single row or several rows with four to eight inches between plants, planting at least two inches below the surface. Mulch with a good four inches of straw or shredded leaves. If the planting area is in a windy site, lay branches over the bed to hold the straw in place.
Fertilize in March and control weeds throughout the growing season. Garlic needs adequate water to develop, so irrigate when rain has not been forthcoming. In June, scapes (the elongated flower stalks) will appear, emerging through the top of the foliage.
To improve bulb size, remove the scapes while they are young by cutting or snapping them off where they emerge from the top leaves. Harvest scapes before they begin to straighten and become stiff. The garlic bulbs are ready to be harvested from early to mid-July. If harvested too early, the bulb size will be smaller. If harvested too late, the bulb will split. Harvest when the leaves begin to brown and at least 4 leaves are still partly green. Reduce watering as this time approaches. Instead, use a spade or shovel to lift the bulb from the ground. The bulbs are tender and easily bruised when first harvested. Use immediately or cure for long-term storage. To cure, allow them to dry and harden in a well-ventilated, shaded area for a few weeks. Then, clean by brushing away loose dirt. Remove one layer of the bulb wrapper, trim the roots close to the wrapper, and cut the tops off 1 inch from the bulb.
If you plan on planting garlic again next season, save some of your largest, best-formed bulbs to plant again in the fall.
Photo: "German Red" garlic is especially suited to cold winters. Diane Diffenderfer, Penn State.
Bug of the Month: Lady Beetles
by Janis Butler, Master Gardener Volunteer
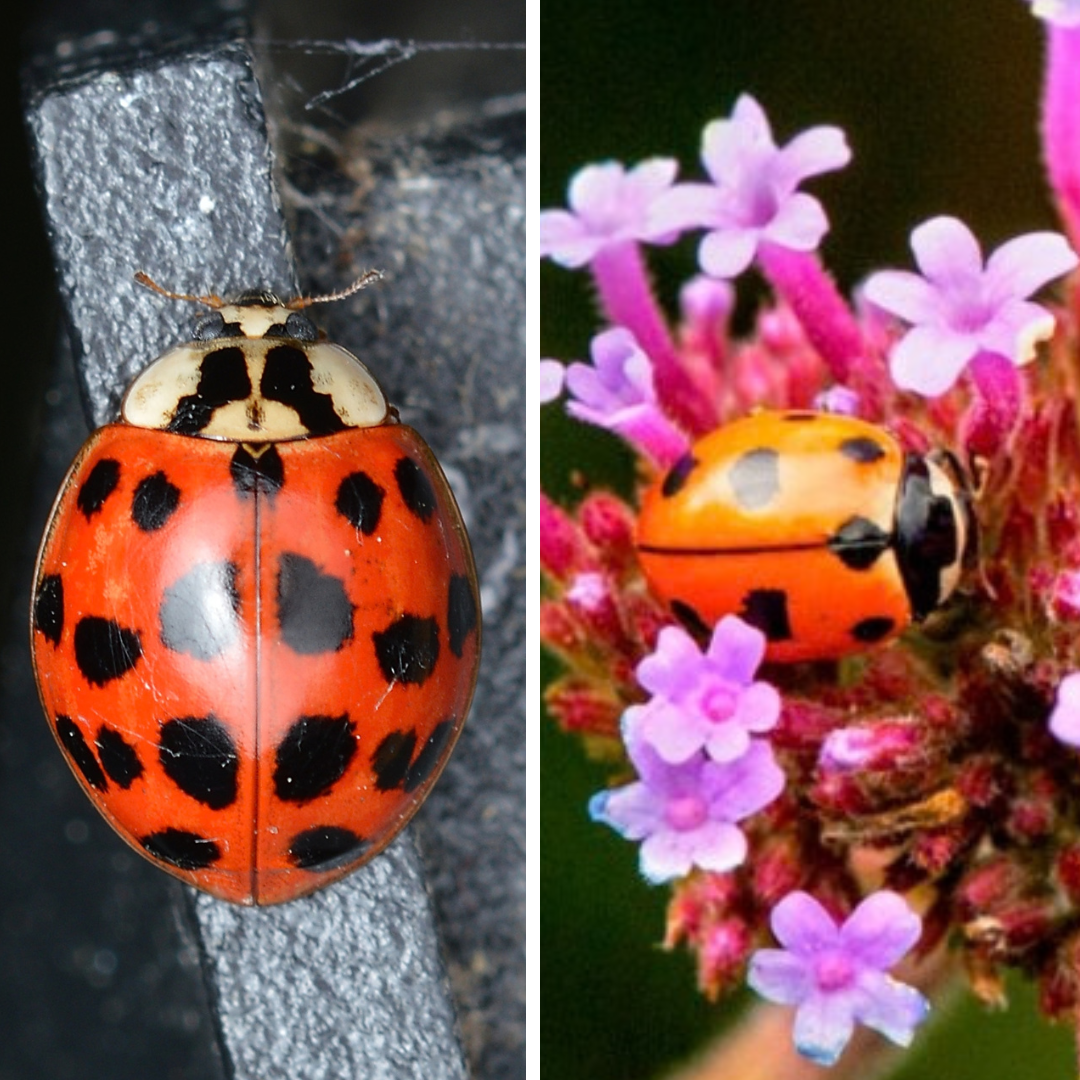
First things first: the name. A ladybug is not really a bug, except in the vernacular. In the world of taxonomy, the order of insects called True Bugs (Hemiptera) does not include our black-spotted orange friend. Rather, it belongs in the order Coleoptera: the beetles. Rest assured, however, that those of us accustomed to calling it a ladybug will be forgiven for continuing to do so. For now, though, we’ll call her a Lady Beetle.
Almost all Lady Beetles are beneficial and welcome in our gardens. There is, though, a question about the Asian Lady Beetle ( Harmonia axyridis), originally imported as an aid to food growers, but now better known for congregating in our homes in winter. Asian Lady Beetles undoubtedly provide the garden services for which we value our native Lady Beetles, but they also compete with the natives: they’re bigger and more aggressive, thereby depleting the food supplies on which the natives depend. They carry certain parasites that are harmless to themselves but lethal or debilitating to native species. And they emerge earlier in spring, gobbling up the aphid supply before natives become active, and even eating native Lady Beetle eggs.
On the other hand, Asian Lady Beetles are voracious consumers of aphids, leafhoppers, mites, whitefly eggs and nymphs, thrips, scale insects, mealybugs, and many other garden pests, earning consideration as a beneficial insect. The adults can consume 100 aphids per day; the larvae, 600 to 1,200, during their larval stage. With the typical two generations per season, each one could remove 5,000 pests from your garden.
Native Lady Beetles can equal these numbers, but the Asian Lady Beetles can outcompete them. The official New York State insect, the Nine-Spotted Lady Beetle ( Coccinella novemnotata), once plentiful, is now on the “critically imperiled” list of the New York State Heritage Program. Other formerly common species like the Convergent Lady Beetle ( Hippodamia convergens ) and the Two-Spotted Lady Beetle (Adalia bipunctata) are becoming increasingly rare. Along with habitat loss, pesticides, and climate change, the Asian Lady Beetle is widely viewed as a contributing factor in the decline of these and other native Lady Beetles.
In addition to its size and aggressiveness, the Asian Lady Beetle is free, in North America, of the specialized parasites and other predators that keep its population in check in Asia, where it evolved. They also secrete a foul-smelling fluid from their leg joints when threatened, more unpalatable than similar secretions from native species, so their numbers are not kept in check by birds and other generalist predators.
In contrast, our native Lady Beetles play vital, specialized roles in local ecosystems as natural predators, bioindicators, and food web participants, providing essential protein-rich food for birds, small mammals, spiders, and other insects, many of whom will not eat Asian Lady Beetles. For example, only swifts and swallows eat Asian Lady Beetles regularly. And shrews and moles, which readily eat native Lady Beetles, avoid the Asian Lady Beetles.
Life cycle
Asian and native Lady Beetles have similar life cycles, beginning with tiny yellow or orange eggs laid in clusters on stems and the undersides of leaves, usually near colonies of aphids or other prey. The females may lay 200 to 1,000 eggs during a season. The eggs hatch in two to five days, and the larvae that emerge look like miniature alligators, usually black with a few orange spots. They begin to eat immediately, specializing in soft-bodied insects, including eggs, nymphs, and larvae, and growing up to 3/8” before pupating.
Pupation takes about two weeks after a hard case forms, protecting the insect while it transforms into an adult. The emerging adult may eat 10 to 50 aphids per day, less than the larva, but it lives much longer — up to a year — so during its adult lifetime, it surpasses its larval consumption rate.
Why do Asian Lady Beetles, not natives, invade homes in winter?
When cool weather approaches, all adult Lady Beetles begin to seek shelter. In their native habitats, Asian Lady Beetles overwinter in warm, sunny places, particularly south-facing rocky cliffs with crevices in which to hide. In our part of the world, human houses and other buildings mimic these sunlit surfaces, especially those with south-facing walls and light colors. They make their way inside seeking warm places to spend the winter. Once a few beetles find a cozy crack or corner of a ceiling, they release pheromones (chemical signals) that attract multitudes of others to the same spot. They do not eat wood or fabric, nor do they build nests or reproduce indoors. They’re simply there to hibernate.
Native lady beetles evolved in a different climate and must overwinter outdoors, under natural cover in rotting logs, under rocks, and especially in piles of leaf litter. Like the Asians, they often congregate when a good spot is found.
How to ID Asian Lady Beetles?
Fortunately, this is relatively easy. Asian Lady Beetles have a distinctive black “M” shape on a white background, just behind their heads. They often have nineteen spots, but the number varies between none and 21, so spot-counting is not a reliable species indicator. Just look for the ‘M’. And they are the only species likely to be crowding your windowsills come cold weather.
Native Lady Beetle species, of which there are 40 to 50 in the Northeast, can also have varying numbers of spots and even varying colors (red, orange, yellow, tan, pink, black, white) as well as varying markings behind their heads.
Are Asian Lady Beetles friends or foes?
The answer is both. For those of us unhappy about Asian Lady Beetles collecting along our windowsills in cold weather, there is some good news. According to Cornell's 'Biological Control: A Guide to Natural Enemies in North America', "Scientists predict that multicolored Asian lady beetle populations will become more balanced when its prey numbers decrease and Harmonia itself falls prey to native natural enemies."
How can we help native Lady Beetles compete?
Provide winter shelter. Rethink fall clean-up and leave leaves alone. Leaf litter is a favorite winter habitat of native Lady Beetles as well as countless other critters. Tree bark, mulch, and rock piles are also good choices. If you must clean up fallen leaves, rake them gently to places on your property where they will be undisturbed.
Plant where they’ll find food. The more you plant, the better chance the natives have of competing with the non-natives. They search plants for prey but lady beetles are also pollinators, especially if prey is scarce. Pollen and nectar supply additional essential nutrients which they cannot get from soft-bodied insects alone. Especially plant early bloomers like sweet alyssum, calendula, and yarrow, and late bloomers like goldenrod, asters, and sedum, to provide food in our lengthening seasons. Consider sunflowers, spicebush, spirea, water lilies, carrot family plants, species with bowl-shaped flowers or sweet or musty odors.
Don’t buy commercially sold ladybugs. Usually the batches consist of wild-harvested native Lady Beetles like the Convergent Lady Beetle that are gathered while the insects are hibernating, then shipped around the country. Removing them from their native overwintering sites depletes wild populations. And besides, they may fly away when they emerge from hibernation, following homing instincts and leaving your yard.
Spray insecticides judiciously. Avoid spraying when pollinators like Lady Beetles are present. Spray only for targeted pests and follow IPM (Integrated Pest Management) guidelines: https://cals.cornell.edu/integrated-pest-management.
Photo credits: Left, Asian Lady Beetle (Harmonia axyridis) by Ryan Hodnett via Wikimedia Commons (CC BY-SA 4.0). Right, Nine-spotted Lady Beetle (Coccinella novemnotata) by Todd Ugine/Cornell University.
Leaves Are Treasure, Not Trash
from Annette MaCoy, Master Gardener, Penn State Extension
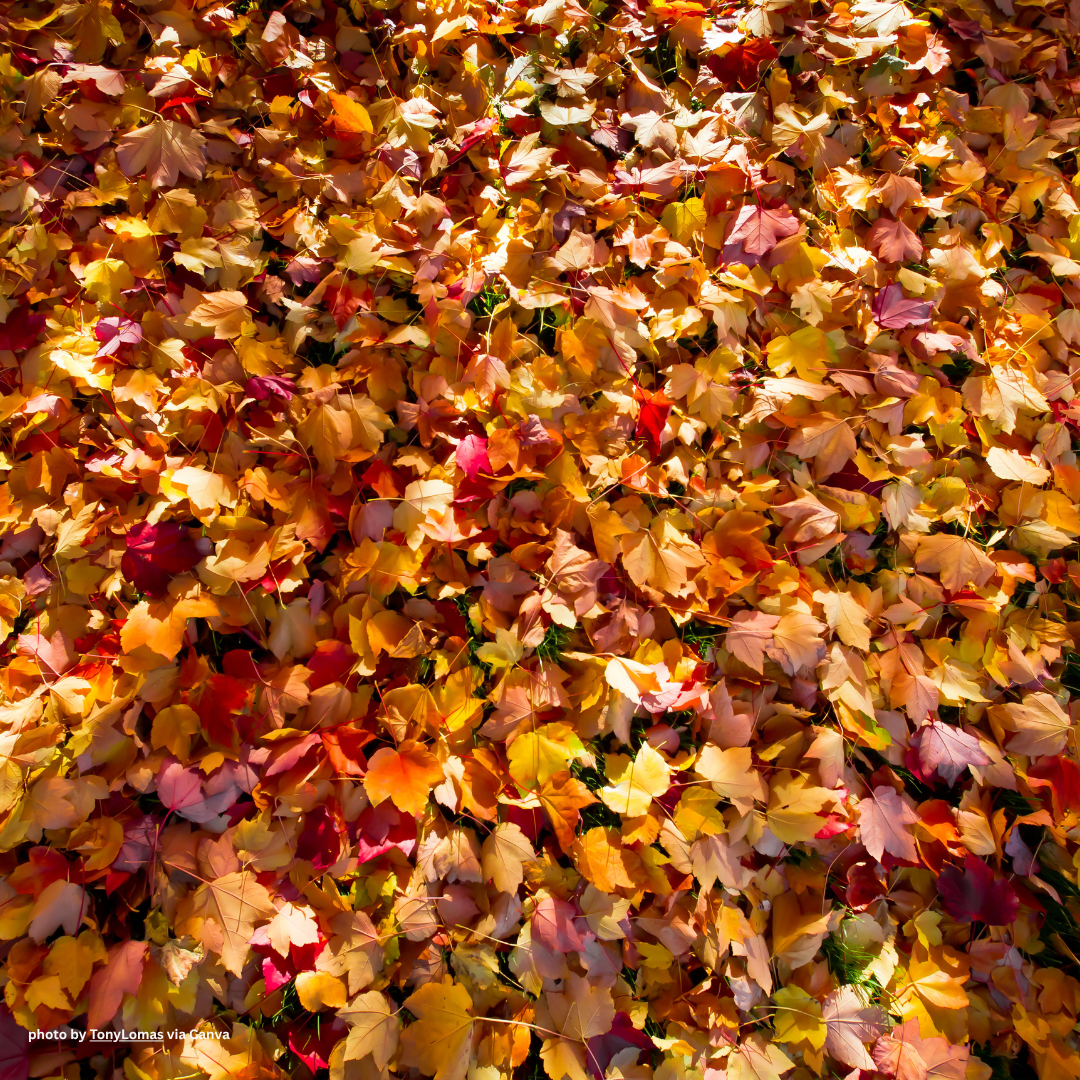
Fallen leaves are a tremendous resource for the gardener, not something to be discarded or hauled off. With just a little effort, they can be turned into an excellent and free mulch for every part of your landscape.
Keep the Leaves
If you have mature trees in your landscape, every autumn those trees present you with a gift of great value. For some, those leaves may seem like an unwanted nuisance, piling up in your beds or on your lawn, a battle to be fought and won when your local municipality or trash hauler takes them away. We, even scientists and researchers, use unflattering terms, leaf "litter" or "duff," to describe them.
It seems strange that in the fall, we rake leaves to put into plastic bags or to the curbside to be hauled away for disposal somewhere else, at a cost to us, and then in the spring, we spend more money on plastic bags of mulch or compost to add to our garden. Or, we go to a local facility to haul home compost sourced from many different places. The problem with that? You do not know the quality of that compost or what may be in it – contaminants, trash, or pests, such as invasive earthworms, that you will regret introducing into your landscape.
It is time to rethink our attitude towards leaves, for the benefit of our own gardens as well as that of the surrounding environment and its inhabitants. If you have the leaves available, why not use what nature provides to restore the natural process of plant nutrient recycling in your yard? If the wind blows leaves from your neighbor's yard into yours, why not thank your neighbors for the free garden gold? Leaves, with some patience but very little effort on your part, can be turned into an excellent soil amendment or mulch that costs nothing but is worth everything to your plants.
There are two basic approaches to recycling leaves. One is shredding the leaves to make mulch or to let them break down into the lawn, and the other is piling whole leaves to transform into leaf mold. From the standpoint of effort and the environment, the latter approach is preferable, but either method is better than removing the leaves from your property.
Shred the Leaves
For shredding leaves, a lawn mower is the only tool needed. A mulching mower works best, but a regular mower will do the job, although not quite as effectively. Simply mow over the leaves on the lawn to shred them, walking or riding slowly to give the mower blades time to chop the leaves. This is easier to do if the leaves are relatively dry and not piled too thickly, so do not wait until all the leaves have fallen to start mulch-mowing them. You may need to go back over the leaves in a cross direction from the first cut to shred the leaves more finely. A layer up to about one-half inch in depth is beneficial to the lawn.
Shredded leaves decay much more quickly than whole leaves. The small leaf pieces on the lawn break down, adding organic matter and returning essential plant nutrients to the soil to be taken up by the grass. Research conducted at Michigan State University found no negative effects of mulching leaf litter into the turf. The quality of the grass improved, with fewer broadleaf weeds; the quality of the soil improved, even to the extent of providing a softer surface for sports; and it had no effect on the soil pH, whether oak or maple leaves were used.
Shredded leaves can also be applied as a 2 to 4-inch-thick layer of mulch around trees and shrubs or on perennial beds. Because they are shredded, they tend to mat down less than whole leaves; and watering the leaf mulch after application will also help it to stay in place. The leaf mulch will help to moderate soil temperatures, retain soil moisture, and keep down weeds. Weeds that do appear are easier to pull because the soil surface remains friable and soft. As the leaves break down, essential nutrients are recycled in the soil to become available again to the plants from whence they came.
Pile the Leaves
The second method of recycling leaves is turning them into leaf mold. Essentially decayed leaves, leaf mold is similar to compost; it is dark brown in color, with a pleasant earthy smell and a crumbly texture. Although it is not high in nutrients, it is an excellent soil amendment that improves the structure of the soil, increases soil water retention, returns essential elements to the soil, and benefits the myriad organisms in the soil – fungi, bacteria, and other microbes, as well as tiny mites and insects – that decompose organic matter. It can also be used as mulch or added to potting soil. And unlike compost or manure, leaf mold is mostly weed-free.
To make leaf mold, form a pile of leaves, pack them down, water them, and wait a couple of years. Although not essential, a wood or wire bin, 3 to 6 feet in diameter and at least 3 feet in height, helps keep the leaves contained. Another possibility is to use a large plastic bag; I use old trash cans. Fill the bag or can with leaves, moisten the leaves, close it up loosely (allow some airflow), and let it sit.
You can also just pile excess leaves in an out-of-the-way corner of the yard. However, if you have a wooded area that already has a layer of fallen leaves, do not pile more leaves on top of that. There are many small insects and animals, including firefly larvae, overwintering insects, reptiles, amphibians, birds, and small mammals, that make use of that leaf layer for shelter, habitat, food, and protection. Dumping more leaves can disturb or disrupt the natural depth (6 to 12 inches) at which they survive.
If you have a compost bin, you may have too many leaves in the fall to fit in the bin, so stockpiling those leaves in a separate pile is a good way to save this valuable resource. In the spring and summer, you can transfer some of your leaf stockpile into your compost bin as you need "brown" materials to layer with fresh "green" materials; the remainder of the leaf stockpile will gradually shrink in size as the leaves slowly decay to form leaf mold.
You can speed up the decay process from years to 6 to 12 months by shredding the leaves, turning the pile occasionally, adding water occasionally, or covering the pile with a tarp, but it will happen eventually, even if you do nothing.
Making leaf mold is outrageously easy. It is a task that rewards the lazy gardener (like me) and teaches the patience of nature (or the nature of patience) to the impatient gardener. For every gardener, autumn leaves on and off the tree are not just pretty, they are a gift of nature waiting to happen.
Root Crop Storage Considerations
from Robert Hadad, Cornell Vegetable Program Specialist
Proper vegetable storage is more than just boxing up produce and sticking it in a refrigerated space. Losses from improper handling and storage can range from 10% -40%,that is money being tossed away after all the hard work of growing and harvesting the crops. With attention to some details, losses can be greatly reduced.
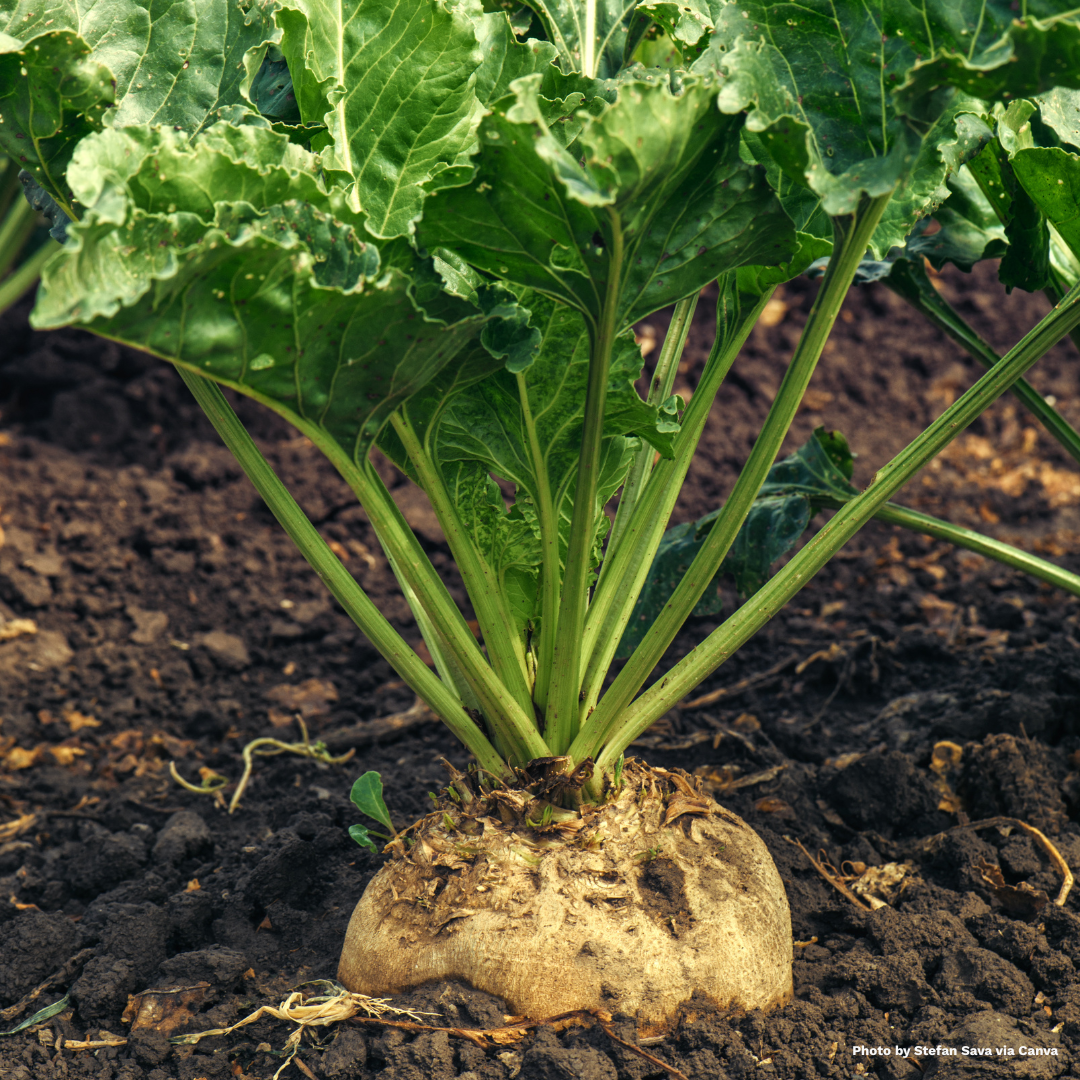
Harvest timing and proper handling are essential first steps. Once the crop is harvested, it is hard to improve quality in storage.
Crop maturity at harvest is important. Baby vegetables don’t store as well as mature crops. For example, new potatoes have a shorter shelf life than full-sized tubers harvested after vines die back. Carrots, garlic, and onions store best at full size (and for garlic and onions after the tops dry and bend over). Sweet potatoes should be harvested after foliage dries. Beets should be harvested at 2–3 inches in diameter (not too big), and timing should align with the variety’s days to maturity.
When harvesting take care not to damage skin, either with mechanical harvesting or loading, transport, and handling. Beets and carrots should be topped, leaving no more than an inch of stem. Garlic and onion stems should be trimmed to a few inches and shortened after curing. Rutabagas and turnips stems should be cut close to the root.
For long term storage, avoid washing or removing dried soil. Course, dry soil helps protect root crop skins. Scrubbing may cause injuries that allow rots to enter during storage. Roots can be cleaned just before sale.
Some root crops benefit from “curing” after field harvest before going into storage (exceptions are carrots, beets, turnips, and rutabagas). Curing involves exposing roots to warm temperatures and good air circulation to dry the skin, heal over superficial wounds, and help seal skin from respiration moisture loss. Temperatures in the upper 70Fs to upper 80Fs along with good air movement (open air or with fans) speeds the process. Spread curing roots into a single layer to avoid damp spots.
Maintaining crop quality in long term storage depends on properly operating coolers, consistent appropriate storage temperatures and humidity levels, and adequate air flow.
Coolers should be well-insulated and free from condensation or dripping water from the condenser. Air exchange is important: coolers can have manual vents or if their door opens several times a day, that can also provide air exchange. Tightly sealed coolers save energy but need frequent air exchange to remove the CO2 and ethylene that comes from the natural respiration of stored produce.
Storage bins should be kept away from the walls to help with air flow. Place several thermometers throughout the cooler, especially when bins are densely packed. Monitor temperatures for cold or warm spots, as dead air space can create freezing temperature pockets. If uneven temperatures are found, add small fans to help with air movement.
Understand specific crops’ temperature and humidity needs
- Beets, carrots, horseradish, celeriac, parsnips, winter radish, salsify, turnips, and rutabagas: stay close to 32°F, 95–99% humidity
- Onions and garlic: about 32°F, but note lower 65–70% humidity
- Potatoes: 38–42°F, 90–95% humidity (If potatoes get too cold, an internal black ring forms around the flesh just under the skin.)
- Sweet potatoes: note warmer than potatoes at 55–60°F, 85–90% humidity
Maintaining humidity levels is a challenge. Some growers store roots in large plastic bags inside tote bins. These bags can be left open or perforated to raise the humidity levels within the bags without reducing all the airflow. Monitor closely to make sure it remains humid enough butdoesn’t excessively condense. If bins are stacked, regularly check bottom bins. Use multiple humidity meters around the cooler and keep tabs on the levels.
Even when doing everything that is needed, some roots won’t last. Scout the cooler frequently, especially the longer the roots are stored. Inspect for off odors, puddling on the floor, or a plastic bag with more condensation in it than the others. Remove anything that has mold or is getting soft to prevent spreading.
4-H News: Celebrating National 4-H Week and Registering for 4-H Clubs
from Brandy Keenan, 4-H Educator
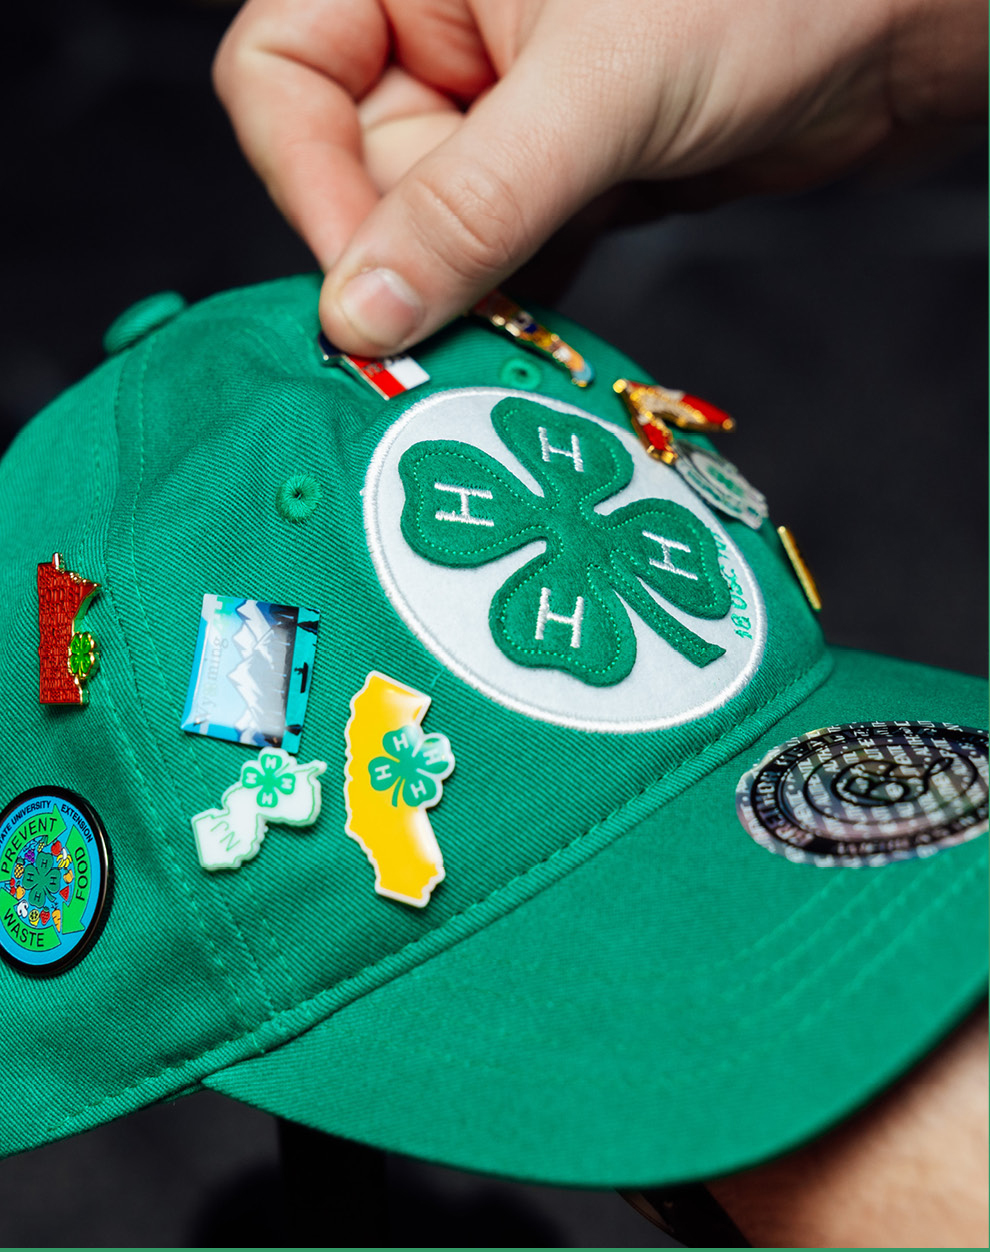
4-H is joining millions of youth, families, volunteers, and alumni across the nation to celebrate National 4-H Week, running from October 4–10.
As part of the nation’s largest youth development organization, local 4-H programs reach thousands of young people through hands-on learning in STEM, leadership, agriculture, and civic engagement. This year’s national theme, “Beyond Ready,” highlights the organization’s goal to help prepare 10 million youth for work and life by 2030.
“National 4-H Week is a powerful reminder that young people are already leading in extraordinary ways,” said Jill Bramble, president and CEO of the National 4-H Council. Locally, members are gaining confidence through public speaking, community service projects, and hands-on skill-building.
Join the Celebration
The community is invited to participate in special celebratory days during the week:
- Go Green Day (Monday, Oct. 5): Wear green clothing, hats, or 4-H gear to show your support and state spirit. Use the hashtags #4HBeyondReady and #National4HWeek.
- Thankful Thursday (Thursday, Oct. 8, 2026): A day dedicated to recognizing community impact, mentors, and thanking those who have made a positive difference in local 4-H experiences.
Registration is Open for our 4-H Clubs!
Registration for Putnam County 4-H is officially open now through Oct. 31. Parents and guardians can register their youth by visiting the 4-H page on our website.
We offer 10 clubs for youth and are excited to have several new clubs this year!
Hay You! Jr. Agriculture Club is for ages 5-10. Members will learn about raising chickens by taking care of a chick and starting seeds in a greenhouse for a “chicken garden.” This year-long project ends with homing the chickens at a local farm and planting the chicken garden. The following year youth will be able to sell their chicken eggs to raise funds for the club. The Hay You! 4-H Club at Tilly Foster Farm will be a livestock and agricultural focused club. Members will learn how to care for and handle livestock as well as basic animal science— digestive and skeletal systems, nutrition and livestocks' place in agriculture, our food systems and the environment.
Top Focus Jr. Equine Club is for ages 6-11. Members will get hands-on experience with all aspects of horsemanship, including grooming, stable chores, general care of horses and farm management. This is a non-riding club.
Reel Rangers Fishing Club is for ages 9+. Members will develop fishing skills, learn about aquatic ecosystems, and fish the waters in and around Putnam County.
SNAP-Ed New York Programming Comes to an End
from Josephine Quiocho, Nutrition Educator
After more than 30 years of providing nutrition education and supporting healthy food access in communities across New York State, the Supplemental Nutrition Assistance Program Education (SNAP-Ed) New York initiative formally concluded operations Sept. 30.
The conclusion of SNAP-Ed NY follows the elimination of federal funding for SNAP-Ed under federal legislation enacted in 2025. In New York State, remaining funds allowed for a gradual wind-down of programming through 2026.
As a federally funded program, SNAP-Ed NY combined practical, evidence-based nutrition education with broader efforts to make healthy choices easier and more accessible. Working alongside schools, food pantries, farmers markets, older adult programs, healthcare and social service organizations, and many other community partners, SNAP-Ed NY supported changes to policies, systems, and community environments.
In 2025 alone, SNAP-Ed NY reached approximately 1.8 million New Yorkers through more than 35,000 workshops delivered at over 900 sites and in collaboration with more than 1,500 community partners. Participants learned hands-on skills related to preparing healthy meals, shopping on a budget, increasing fruit and vegetable consumption, being physically active, and accessing nutritious foods. Among participants evaluated, 58% improved their fruit intake and 58% improved their vegetable intake.
The end of SNAP-Ed funding represents more than the conclusion of individual classes and programs. Over many years, SNAP-Ed NY built relationships and infrastructure within communities across the state, connecting nutrition education with trusted organizations and resources that support the health and well-being of New Yorkers.
SNAP-Ed NY extends their deepest gratitude to the educators, community partners, and participants who have made SNAP-Ed NY a meaningful and impactful program. Their contributions have helped New Yorkers build practical skills, connect with resources and make healthy choices for themselves and their families.
As SNAP-Ed NY programming comes to a close, we encourage community members to stay connected with local organizations for information about available programs and resources. Existing SNAP-Ed NY materials and resources will remain available online for as long as possible.

Last updated October 1, 2026

Savannah Fox: Natural Resources Program Coordinator

Savannah brings a great passion for ecology and cultivating human connection with nature to our organization, and she looks forward to creating spaces for local communities to gather and learn. With more than four years of experience restoring and stewarding natural areas, Savannah specializes in land and native plant conservation through invasive species management, planting techniques and design, ecological monitoring and geospatial mapping.
She launched her environmental career at organizations such as the United States National Arboretum, San Antonio Botanical Garden and Green Spaces Alliance of South Texas. Over the course of her career, she has engaged hundreds of community members through educational programs, stewardship training and volunteer engagement. Savannah holds a Bachelor of Science in Geography, Natural Resources and Environmental Studies with a minor in Horticulture from Texas State University.
Her joys in life include hiking beautiful landscapes with her partner, cuddling with her cat and designing floral arrangements.
As the Natural Resources Program Coordinator, Savannah will continue progress on the Restore and Regenerate Forest Project, develop and facilitate educational programming with Master Gardener volunteers and diverse partners and continue providing Putnam County residents with practical, research-based education and resources from Cornell University.
October is ...
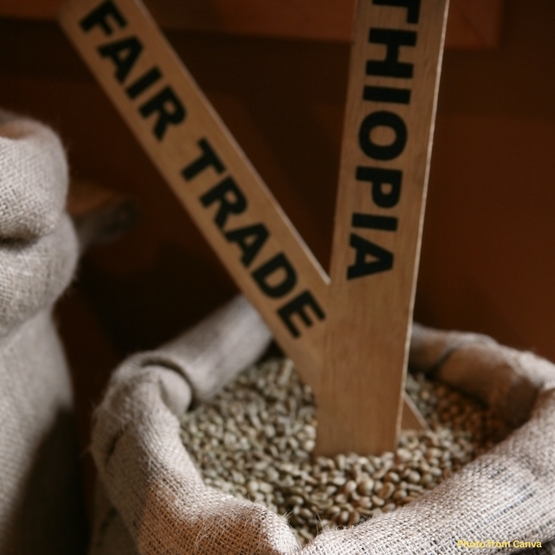
National Fair Trade Month
October is National Fair Trade Month, which is observed annually to raise awareness about the fair trade movement to our global economy. The idea is to not only purchase products that are supported by Fair Trade alliances, but also to share awareness for the cause with others so that they can change their buying habits too.
Resource: www.fairtradeamerica.org
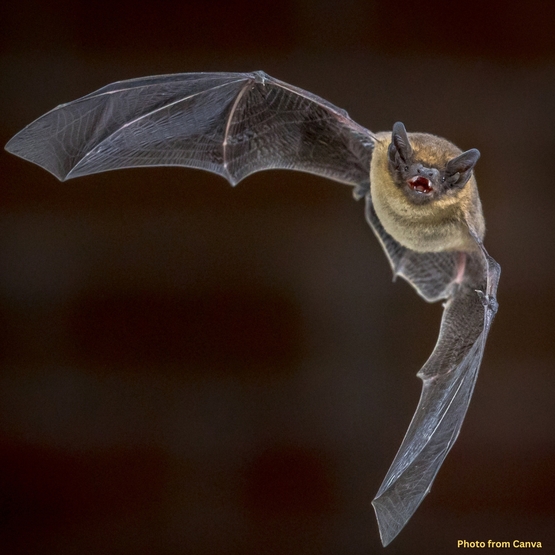
Bat Appreciation Month
While many people find them a little creepy, bats are pretty amazing animals. October is Bat Appreciation Month to recognize the important role bats play. Some are pollinators, some control insect populations and some help disperse seeds to help restore the world’s forests.
Read these 20 reasons to appreciate bats courtesy of the National Parks Service: https://www.nps.gov/articles/bat-appreciation-day.htm
Resource: Smithsonian Institution

National Cookbook Month
About 18 million cookbooks were sold in the United States alone in 2017, proving perhaps, that even though the internet is rife with recipes, nothing beats the old standby – a good cookbook. If you don’t own a cookbook take a trip to the nearest bookstore or head to your local library and find something that interests you!
Fun Fact: The oldest recorded recipe in history dates back to Babylon in 1750BC. Four culinary tablets made from clay feature a recipe for meat stew. The recipe was replicated by chefs in 2018 at New York University. The ingredients were meat, smoked wood, vinegar and herbs.
Resource: National Library of Congress

Breast Cancer Awareness Month
October is Breast Cancer Awareness Month, the perfect time to schedule your annual mammogram if you haven’t already. The American Cancer Society estimates that in 2025 about 316,950 new cases of invasive breast cancer will be diagnosed in women; about 59,080 new cases of ductal carcinoma in situ (DCIS) will be diagnosed; and 42,170 women will die from breast cancer. However, breast cancer deaths have been decreasing steadily since 1989 with an overall decline of 44% through 2022. This decrease is believed to be the result of early detection through screening and increased awareness, as well as better treatments.
Source: American Cancer Society

National Cookie Month
National Cookie Month invites everyone to indulge in one of the world’s most beloved treats. According to UF/IFAS Extension Brevard County, cookies are more than just delicious snacks—they carry a rich history and have become a key part of holiday traditions. Did you know that the word “cookie” comes from the Dutch word “koekje," which means “little cake”? According to the Oxford Dictionary, cookies were originally less sweet than the versions we know today. In fact, in some countries, cookies resemble semi-sweet crackers. In many parts of the world, especially in the UK and Commonwealth countries, cookies are referred to as “biscuits.”
Source: National Today
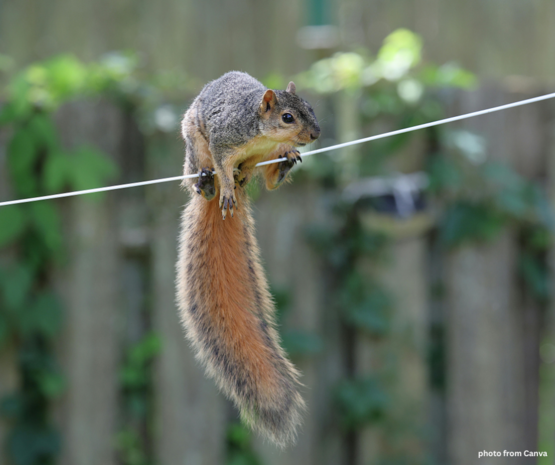
Squirrel Awareness Month
In 1995, Greg Basset founded the Squirrel Lover's Club and celebrated the first Squirrel Awareness Month. You too can celebrate by appreciating the cunning and acrobatic abilities of these bushy-tailed critters. Read Beatrix Potter's "The Tale of Squirrel Nutkin" or watch videos online of squirrels figuring out complicated obstacles to obtain seeds and nuts from bird feeders. Did you know squirrels don’t dig up all of their buried nuts, resulting in more trees? They have unintentionally contributed to planting countless trees in our nation’s forests.
Source: The Squirrel Lovers Club
It's Always Bat Season!
from Putnam County Department of Health
Bats can be active year-round and occasionally, they can find their way inside a home. An open window, a small opening around the roof, or another entry point can be enough for a bat to make an unexpected appearance indoors.
While seeing a bat in the house can be startling, it is important to act fast. Bat bites can be small and may go unnoticed, so it may not be possible to tell whether a person was bitten, especially if the bat was found in a bedroom where a person, pet, or infant has been sleeping. That is why capturing the bat for rabies testing is essential.
Here are the steps on how to capture a bat:
1. Close any windows and doors.
2. Gather a container with a lid or cardboard, tape, and THICK gloves. Thick gloves are necessary to prevent unwanted bites.
3. Wait for the bat to land and slowly approach it. Place the container over the bat, slide the lid or cardboard underneath. Hold it firmly in place and flip it over.
4. Secure the cardboard or lid on the container with tape.
After capturing the bat, give the Putnam County Department of Health a call at 845-808-1390, to arrange for rabies testing. If a bat is captured during a holiday or weekend, just dial 845-808-1390, press 3 to leave a message and someone will call you back very soon. The experts will help handle the rest!
Useful Links:
- NYS Department of Health: How to Safely Catch a Bat
https://youtu.be/_YhnV5WJQBA?si=gCNh4x0CXJokJbWx - Putnam County Health Department: Rabies
https://www.putnamcountyny.gov/health/rabies#bat
DEC Announces Updated New York State Wildlife Action Plan
from New York State Department of Environmental Conservation
New York State Department of Environmental Conservation (DEC) Commissioner Amanda Lefton has announced that the New York State Wildlife Action Plan for 2025–2035 is now finalized. The State Wildlife Action Plan (SWAP) guides conservation and management actions for New York’s Species of Greatest Conservation Need (SGCN) and is a requirement for New York to participate in the federally funded State and Tribal Wildlife Grants Program.
“The State Wildlife Action Plan serves as DEC’s guiding document for managing and conserving species and habitats before they become too rare or costly to restore,” said Commissioner Lefton. “This action plan reflects more than two years of review and coordination between DEC, partners, and stakeholders to identify our state’s species in greatest need of protection and develop strategies and actions to address threats and promote healthy populations.”
To remain eligible for federal funding, Congress requires states and territories to develop a SWAP and update it every 10 years. SGCN are species native to and extant in New York that are currently experiencing threats likely to result in further decline of their populations in the state if conservation actions are not implemented within the next 10 years. States may only spend grant funds on SGCN identified in their SWAP.
In revising the SWAP, 920 wildlife species were assessed, including all SGCN from the 2015 SWAP and 441 additional species. Important habitats, population trends, and the presence of threats were identified for each species. These assessments resulted in designating a total of 570 wildlife species as SGCN, 147 of which are considered High-Priority SGCN. New for this revision, the SWAP also identifies 269 plants as SGCN.
The final, approved 2025 SWAP, updated SGCN list, and Species Status Assessments are available to download from DEC’s website.
DEC Offers $2.7 Million in Conservation Partnership Grants
from New York State Department of Environmental Conservation
New York State Department of Environmental Conservation (DEC) has announced that $2.7 million was awarded to 45 not-for-profit land trusts across the state. The funding, made available through the Conservation Partnership Program (CPP), will support 56 projects designed to support land trusts and their ongoing work, which complement the State’s efforts to conserve open space, boost public access for outdoor recreation, protect water quality, and promote climate resiliency.
“This year marks the 22nd round of Conservation Partnership Program grants, demonstrating New York’s commitment to supporting Land Trusts in their important work,” said DEC Commissioner Amanda Lefton. “Partnerships with land trusts are essential to achieving our statewide conservation goals. Continuing this successful partnership with the Land Trust Alliance and New York’s land trusts across the state ensures the benefits of open space are enjoyed by all including providing recreation access, supporting community conservation projects, and promoting climate resilience through land stewardship.”
The CPP grants are supported by the State’s Environmental Protection Fund (EPF) and will leverage an additional $2.2 million in private and local funding. The Land Trust Alliance administers the program in coordination with DEC. Since its creation in 2002, CPP has awarded 1,325 grants totaling more than $36.7 million to 100 land trusts, with the funding leveraging at least $36.8 million in additional private and local funding.
The grant awards range from $6,861 to $100,000. More details are available on DEC’s website. This year's grantees include 38 accredited land trusts whose work and operations meet standards for land conservation, stewardship and nonprofit management.

CLICK HERE and become a part of our efforts
to build our new home at Tilly Foster Farm!
Tidbits

We Want to Hear From You—Help Shape What Comes Next!
At Cornell Cooperative Extension Putnam County, our programs and services are built around the needs of our community. Now we’re asking you to help us decide what comes next.
We invite you to take a few minutes to complete our Community Survey and tell us what matters most to you. Which programs and services do you value? What would you like to see more of? What needs are we not currently meeting? And if you haven’t used CCE Putnam’s services before, we especially want to know why and what would make our programs more relevant to you.
Your feedback will directly help us set priorities, improve existing programs, and identify new opportunities to better serve Putnam County residents.
YOUR VOICE CAN HELP SHAPE OUR FUTURE
The survey is short, but your input can have a lasting impact. Don’t leave it to someone else to tell us what our community needs—we want to hear directly from you.
Take the Community Survey today at https://cornell.ca1.qualtrics.com/jfe/form/SV_bNToAleFfZMHqce
Tell us what’s working. Tell us what’s missing. Tell us what you want to see next.
This is your opportunity to help shape the programs, resources, and services CCE Putnam provides in the years ahead. Whether you’ve participated in our programs for years, joined us just once, or have never used our services, your perspective matters.
Please take a few minutes today to complete the survey—and encourage your friends, neighbors, and family members to participate too. The more voices we hear, the better we can understand and respond to the needs of Putnam County.
We’re listening. We want to hear from you. Help us shape what comes next.
Restore & Regenerate Forest: Get Involved!
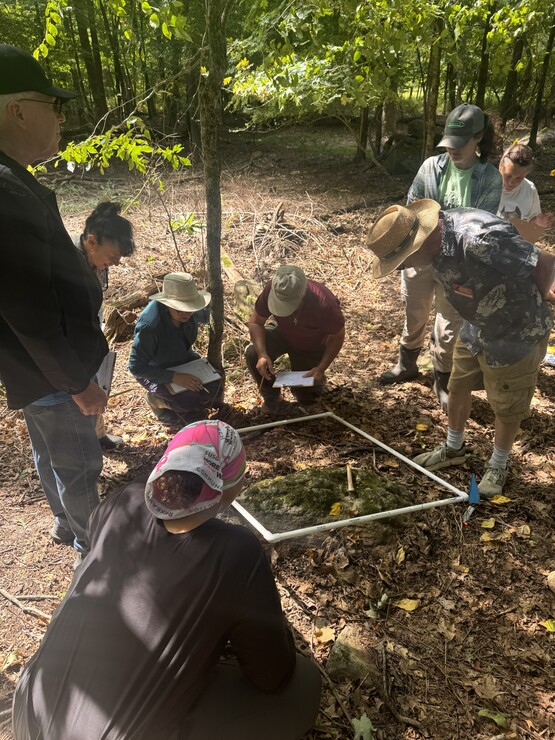
Recently, our Restore and Regenerate Forest restoration project at Tilly Foster Farm in Brewster entered a new phase. We have begun monitoring seedling success between the forest enclosure and the surrounding unprotected land. During the September training session, volunteers learned how to catalog the forest flora and fauna.
The 15-year community science and forest stewardship project, supported by New York State Department of Environmental Conservation, brings together Veterans, families and community volunteers to help restore the forest while documenting how the ecosystem changes over time.
The forest will serve as both an outdoor classroom and community science site, with opportunities to learn about forest restoration and contribute to hands-on research and stewardship.
Volunteers can get involved with:
- Forest plot monitoring and biodiversity surveys
- Plant and insect identification and iNaturalist projects
- Native tree planting and seedling care
- Invasive species management
- Nest box monitoring
- Educational hikes, nature walks, and other outdoor programs
Our tree survey plots are now installed and baseline biodiversity monitoring is getting underway. As the project grows, there will be new opportunities for volunteers to participate in research, stewardship, and educational programs at the forest.
Interested in getting involved? Join us for Nature Journaling & Biodiversity Scavenger Hunt, Nov. 14 from 9:30 a.m. – 12:30 p.m.
Learning the Ins and Outs of Silvopasture From Area Experts
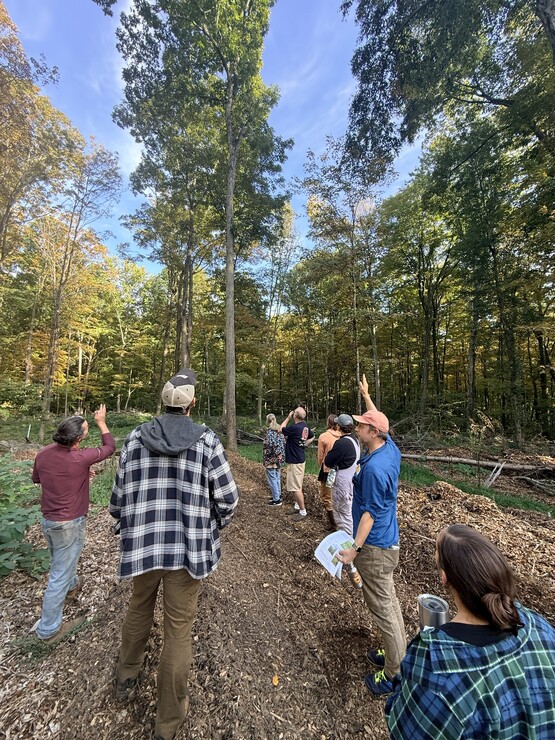
During "Establishing Silvopasture: Roots of Resilience," participants took a guided field walk at Little Cabin's Farm, exploring core silvopasture principles, including site assessment, design, species selection and grazing management. As the farm is in the early stages of transitioning, it was a great opportunity to gain practical insight into how to get started and cover steps for transitioning woods or pasture into productive, animal-friendly systems, with a focus on soil health, biodiversity and long-term viability.
Prior to the farm walk, CCE Ulster Livestock Educator Kathryn Brignac shared insights on grazing and animal management. Donald Arrant of Watershed Agricultural Council discussed the farm’s Whole Farm Plan and Eli Roberts of Sunfleck Consulting talked about how silvopasture can reshape conventional ideas of a productive landscape.
Nutrition Educator Holds Workshops at County Friendship Centers
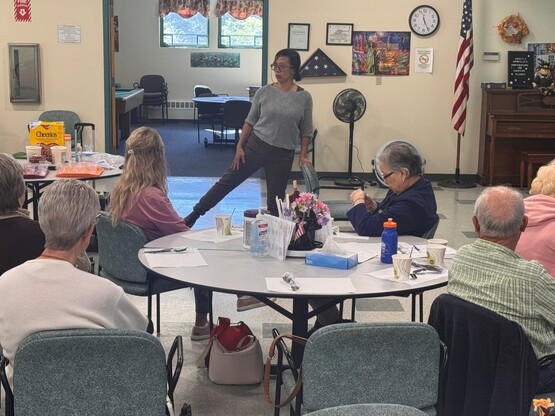
Nutrition Educator Josephine Quiocho recently visited the Office of Senior Resources' Friendship Centers countywide. During her presentation, she emphasized the important of movement and nutrition in the prevention of falls during Falls Prevention Week. Participants learned some easy exercises that can be done while watching TV or doing chores and enjoyed a yogurt parfait.
At a Glance ...
 4-H Fishing Clinic
Saturday, Oct. 3
9 a.m. to 1 p.m.
2 p.m. to 6 p.m.
Tilly Foster Farm
100 Route 312, Brewster
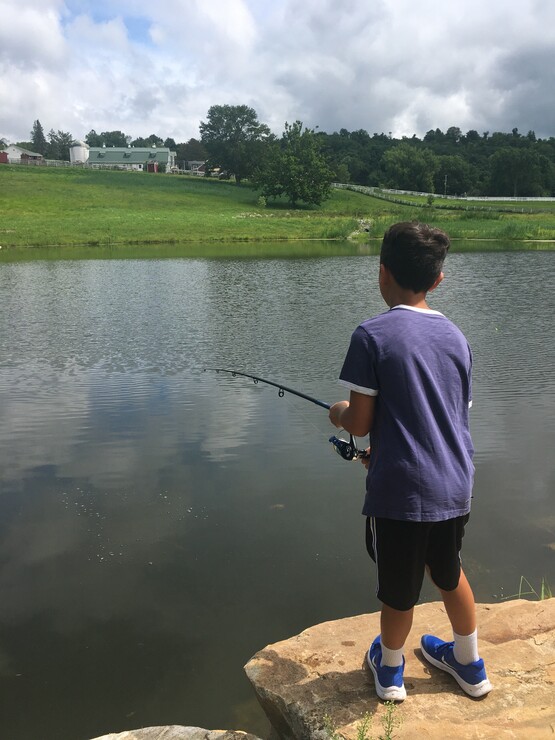
Children ages 3-15 can enjoy a hands-on Fishing Clinic at the pond at Tilly Foster Farm. The event is perfect for young anglers eager to learn the basics of fishing. Guided by Blackout Outfitters, participants will discover essential skills like casting, baiting hooks and identifying local fish species, all in a fun and supportive environment. No prior experience or fishing license is needed, and all equipment will be provided. It’s a wonderful opportunity for kids to connect with nature, build confidence, and create lasting memories by the water.
Session 1: 9 a.m. to 1 p.m.
Session 2: 2 to 6 p.m.
Open to Putnam County residents only.
This program is sponsored by Stewart Marine Fish and Wildlife Fund, Inc.
Fee: Free
Register HERE.
Chick Chat: They're Laying. Now What?
Thursday, Oct. 8
6-7 p.m.
Tilly Foster Farm
100 Route 312, Brewster
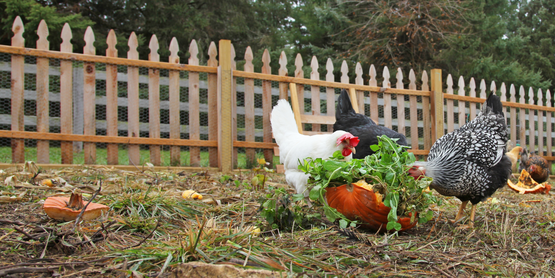
Join CCE Putnam 4-H Educator Brandy Keenan and Jenna Sadecki of Agriventures Agway for "Chick Chat: They're Laying. Now What?" This will be the second presentation in our series focusing on raising backyard flocks and will discuss how to care for your chickens once they start laying eggs as well as preparing for colder weather, feeding and nutrition and flock health management.
This event is family-friendly and will include an activity for children.
Light refreshments will be served.
This program is being held in partnership with Agriventures Agway.
Fee: $20
Register HERE.
.png?1777316584)
Agritourism Webinar Series
Through Dec. 8
12 to 1 p.m.
Online
Join the Cornell Cooperative Extension Agritourism Program Work Team for a monthly webinar series designed to support both new and established agritourism operators.
This educational series provides practical guidance, timely tools, and real-world strategies to help farms strengthen agritourism operations, manage risk, enhance visitor experiences, and improve long-term business sustainability.
2026 Webinar Schedule:
- Oct. 13: Understanding Agricultural Assessments
- Nov. 10: Using Online Platforms
- Dec. 8: Deep Dive into Agritourism Insurance
Webinars made possible through funding from the USDA NIFA Beginning Farmer and Rancher Development Program.
Fee: Free
Register HERE.

Business Development and Marketing Monthly Webinar Series
Through Dec. 15
12 to 1 p.m.
Online
Join Cornell Cooperative Extension for a Business Development and Marketing Zoom series. All sessions will be led by content experts across the Cornell Cooperative Extension system, organizations and businesses which support agricultural operations across New York State. The list of topics and dates are listed below:
- Oct. 20: Business Structures 101 with COUGHLIN & GERHART, LLP
- Nov. 17: How to Evaluate Market Opportunities
- December 15: Overview of Market Channels & Requirements for Participation
Fee: Free
Register HERE.
2026 Cut Flower Webinar Series
Through Dec. 16
12 to 1 p.m.
Online
Cornell Cooperative Extension’s Cut Flower Program Work Team invites cut flower growers to join a free monthly webinar series focused on practical, research-based strategies to support successful production. All webinars will be recorded.
- Oct. 21: Forcing Tulips
- Nov. 18: Growing Gorgeous Dahlias the Regenerative Farmer’s Way
- Dec. 16: High Tunnels: Ranunculus and Anemones.
Fee: Free
Register HERE
Free Webinars Offer Land Use Information
Cornell Cooperative Extension of Broome County invites farmers, landowners, and individuals across New York State of all experience levels to attend a biweekly webinar series running noon to 1 p.m. starting Oct. 6 and ending Dec. 1. The schedule for the series is as follows:
- Oct. 6 - “Agricultural Assessment” with NYS Office of Real Property
- Oct. 20 - “Land Use Zoning Explained” with Pace University
- Nov. 3 - “Designing a Land Lease for You” with Sam Rose (Cornell Small Farms Program)
- Nov. 17 - “Land Conservation Programs Overview” with Upper Susquehanna Coalition, Broome County Soil and Water Conservation District, and Otsego Land Trust
- Dec. 1 - “Accessing State or County Owned Land” with Todd Hyman of Hylight Farms, NYS Office of General Services, Finger Lakes National Forest Grazing Program, and Wesley Daisley of Ontario County Department of Public Works
This webinar series will provide individuals with practical information about accessing, conserving, using and leasing land. The overall goal of this series is to help participants make more informed land-use decisions, identify resources and better understand opportunities around increasing access to and conserving agricultural land.
Register HERE.
Questions can be directed to Maisie Neuber, Beginning Farmer Educator, mln77@cornell.edu.